Showing posts with label nutcracker. Show all posts

14 August 2016

Another nutcracker - sweet!!

We recently bought a cleaner for the dishwasher, which was an almost exact replica of the Charlie's bottle I used for the original Nutcracker, so I made another one!


Slight changes were made during the replication process, since each one presents its own challenges, but the main one is the arms. I used a smaller gauge dowel, which ended up a bit short. I could have remade them, but added a piece to the top instead to balance them out. I think it works pretty well :)

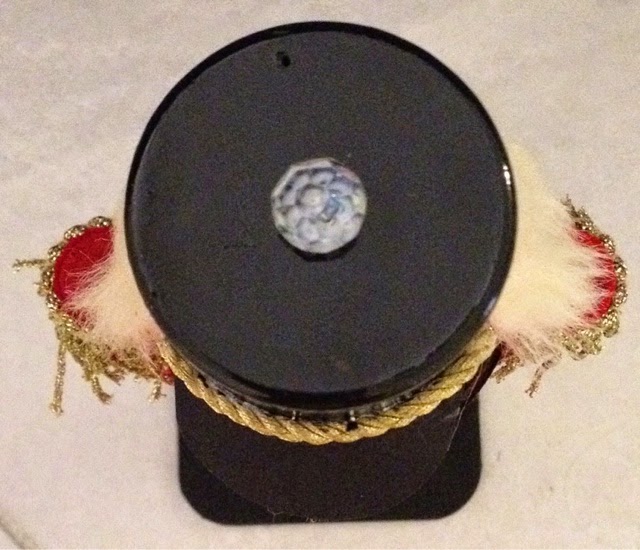
Also modified the hat, this time trimming down the lid, which helped it sit flush with the edge, rather than poke up over the top.

Pretty pleased with him. You can never replicate it exactly, but then, why would you even want to? ;)


27 October 2015

Yellow nutcracker...

I had been looking at the yellow bottle for ages, but was not happy with it still being sticky. The decoupage sealer did not dry properly, so I stripped off the paint and started again. I am definitely using Mod Podge from now on!! 

Nothing more to say, other than here he is! Same techniques, different layout.... :) Again, forgot his little beard, which I have now added, but not before I took all the photos! 


I have the others going into the Canning Show next week, so cross fingers I get a couple of prizes. But there wasn't really a category to put them into, so I went with "Christmas" for the green and red ones and "any other article" for the rest. One specifies "junk art", so I think this fits?? We will see... I didn't get anything else that is show worthy, except Dotty and her rabbit. Not expecting any major prizes, but at least I participated, right?? ;)

14 October 2015

Nutcracker Suite - a copy, of sorts...

So far I haven't copied any examples exactly from a picture, but this one inspired me ;)

I started with a square juice bottle, and it kind of evolved from there! I just used what I had on hand, although I did have to buy some dowel, as I ran out, and the gold ribbon, as I didn't have one wide enough.


This was quite challenging, as the base of the bottle was not flat, so I used part of the coffee pod to flatten it out. Plus, I cut the neck of the bottle off. It just so happened that the other part of the coffee pod fitted exactly into the bottle neck, so I was able to use this as a base to attach the head. 


The cup I was going to use as his head is now his hat. Turned over, it worked great, but it needed to be capped somehow, so a bottle cap did the trick. Oh, and his shoes are biscuit joiners :)


He's maybe a little pink, but I didn't have a beige paint, so it will have to do. And his legs are a little skinny, but it's what I had on hand......


Overall, I think he turned out great. He is slimmer than the other ones I have done so far, but I am pleased with him. ;)


26 September 2015

Nutcracker, with a twist....

So, this other Nutcracker is a little darker, so his tunic needed to be a different colour. Not so bold and bright, more muted and winter-y. I found that orange and brown worked with his skin tone. As it happened I found a lot of these colours in my stash, including some fringe, which is a bit more pink but seems to work ok.

I also made his arms thinner, as the thicker wood plus the felt made them too fat. Still need to attach the legs, but here he is all mocked up....


As luck would have it, his hat is already the right colour, so no need to paint it. Need to spray his hands to match his head and glue all the bits on, but he should be done by the end of the weekend. 

Then on to the yellow one! ;) He is pretty much ready - he has been sitting like this for a while now, and I quite like it! I have run out of wood for his arms, though, so I need a quick trip to the hardware store..... Who am I kidding? It's never "quick"!! ;)


Update 28/9
I knocked off his nose and tore off some of his face paint. When will I learn?? :(

So, I had to strip back the colour back to nothing, but I only went as far as where the hair would be. I then reprimed and repainted it. Since it was already attached to the body (which was already completed) I had to tape it up really well to prevent overspray.

It's not too bad, but I have had to redo his face completely, so he looks a little different, but overall he is the same. Legs are done, too. I think I will leave them plain black.....


Update 2/10
He is done! I quite like this colour way, as it's a bit more neutral and exotic looking..... 


23 September 2015

Three little soldiers...

Aren't they looking good as a trio?


I think I know what everyone is getting for Christmas! ;)


I still have two in progress, so best get back to it! :) As you can see, I did end up adding his little beard. He looked a little unfinished without it......


12 September 2015

Nutcracker 2.0

I have been experimenting with a new type of coffee tin, since my other type has been discontinued. Mind you, I have enough to last FOREVER!! ;)

These ones are shaped like they have a little waist on them, and as luck would have it, fit the same plastic cup for the head as the other ones... Perfect!


The only significant change is that, as it's not straight sided, I need to paint it. There is no chance I can use felt to cover it with that amount of curvature, so I need a rethink on the body design. It's also slightly larger than the other ones, but not by much.

Once the label is removed, you can tell that the plastic is going to need an undercoat. This time I decided to try a brush, rather than the spray paint. I bought a small tin of paint specifically designed for plastics, and some small rollers. The roller was difficult to manoeuvre over the curves, so I used a large brush. Left to dry, it wasn't too bad.

Then, on to the paints! I have a BUNCH of acrylics in random colours, so I picked a green and a yellow to experiment with. The acrylic needs at least 3 coats to make it solid, or it's a little streaky. I used the same method on the cup, and mixed up some custom skin tone. A couple of coats, turned out not too bad ;) 

So anyway, here is where I am at. I need more dowel for his arms, and painting, but so far so good. They all still need to be top coated, but I will do that once I have the arms and legs painted as well...


I have some gold buttons, which I will stitch on before I glue on the bib. Not sure if it will go on the green or the yellow body, yet.....

Update 13/9
So, I tried to add some colour at the bottom of the shirt, below the belt part. I used some tape to mark some lines, and when I pulled it off, so came the paint! Oops!! So, started again from scratch. 

This time, I planned the colour change before I painted the green. I found that trying to paint the red over the green was not going to give me a vibrant colour, anyway. So, I marked the level of the belt, and pencilled in the lines, and just painted it all again. 

Several coats of paint later, and I think I'm finally ready for the sealer!


Update 21/9
He is all sealed, but I think I used the wrong type of sealer ;( It took FOREVER to dry, and even now is a little sticky to touch. Oh, well, he's just a tester, so I will only used Mod Podge from now on. I only have matte finish, but this will have to do, for now...

Finally got him fully assembled, to see how he looks. I'm pretty pleased!


Still need to finish his legs and need to sort out his hat, but overall progress is good :)

Update 22/9
He is done!! Learned a lot about paint, sealer and glue with this one. Not sure if I want to add a beard - so far I'm ok with it, but can always add it later.....

Still have the yellow one to go, but, I have some ideas brewing ;)


The gold circles are from foam and a hole punch ;) His hat is craft foam, partially painted with ricrac glued on. The dome is a styrofoam egg, trimmed at the bottom, couple of coats of paint and sealer. The top ball is a plastic ball painted in gold.


18 January 2015

Another Nutcracker!

This time in blue. He is more like a soldier than the first, but he wears a crown ;)


This one was done with a lighter "skin", so he doesn't look quite so sunburnt. His nose is half the dowell, glued and painted with the head. 


What a profile, hey?

I like how freeing it is doing the moustache, mouth and eyebrows freehand. No two will ever be the same! BTW, the eyes are made using a standard hole punch...


 I really want to try one of these with a bent elbow. Maybe next time?

I have found a local wood supply shop that sells small balls that will work better for hands, as they don't have the hole on the end like the beads do, plus they are actually round. They are a little more expensive, but I think it will give a better result. I am going to use up the beads I already have first, and move on to the new ones after. Still have 2x pairs to go, I think. I also found a packet of "cover buttons", which are a half ball on a little base. Not sure if I can use these for anything, but you never know ;) (sorry, it's a little out of focus...)


I have been using the Boy's drill to make these, but it is a bit big and clunky, so he bought me my own. And it's a cutie, too! It comes in a box, with a drawer to store all the bits and bobs, and stores away like a makeup case. Who needs flowers, eh? ;) 


I really should get started on my Snow White set, but these Nutcrackers are so much fun! :) 

03 January 2015

Temporary tattoos aren't just for your arm!!

I needed an Aussie flag for the front of the shirt of my patriotic nutcracker. What better to use than a temporary tattoo?

I did a test on a scrap of fabric, and it turned out pretty well. No idea how durable it will be in the long term, but it seems to be stuck there ok.

I think I paid $1 for 16 individual decals. I just applied them as you would to the skin, and that's it!


I didn't get the corner perfect, but it's just a test, right?? The actual shirt turned out nice and clean...


It is actually straight, its just the camera angle.... ;)


01 January 2015

Aussie nutcracker...

I think all the components are ready, just need some refining and then I can put it all together. Here are all the bits - so far....


Never thought you would see a pair of shorts on a can, did you? ;) He also has a hat....


Now that he is together, I need to think about a face. I think simple will be best, so I am basing it on the other nutcracker. I need to get some Aussie flags and bits for accessories, but essentially, he is completed. A quick finish for the new year! 

31 December 2014

Minions DONE!!!

What a cute group. Looks like they are having a good ol' chin wag, don't they?? Banana!! ;)


What more can I say, but the middle one is my fave.......

I have a new nutcracker on the go, too - with a twist. I am trying to use the proportions to make something specially for Australia Day. If it doesn't work, he will become a nutcracker. No point wasting it :)


Planned this one out in the middle of the night, as you do. He will have bent arms, and possibly holding something - not sure yet what that will be. Maybe a flag?


And he will wear some thongs...... 


This is going to be challenging, but a load of fun!!

28 December 2014

Final stages! Yay!!

So, just waiting for the glue to dry, and I can put all the bits together! YAY!!

Learned a lot along the way. Firstly, spray paint goes bad. The red paint I used had been in the shed for quite some time, and had heaps of trouble getting an even coverage. The other colours were bought new and worked perfectly. I will try using coloured paper next time....

Secondly, do the face first. Since I started with the hat, and attached it, then had an issue with damage and had to redo it, I would definitely leave it till last. Trying to patch it up was not 100% successful. Also, trying to put the face on would be easier without the obstructions ;)

And here he is!! 


Close up of his torso and sleeves...


View from above...


From below... 


27 December 2014

Disaster strikes!!

I had a fail... :(  A BIG one....

His head fell over (since I haven't attached it to the body yet) and the bead on his hat came off with a bunch if paint. DISASTER!! Especially since everything else has been attached. I tried to just tape off the top and re spray, but the tape I used took off MORE PAINT!! O.M.G!! You can't be serious??

I had to scrape all the paint off and start again. More taping off, more primer, more paint, and I think I have succeeded...to a point. This will definitely be a keeper.

Anyway, I went back to Bunnings and got some rectangle pine to use for his boot. They may be a little long, but, as already mentioned, it's a keeper :)

He is not yet glued together, but I think he is progressing nicely...in spite of everything that has happened today.


I also redid a nose, so his face will be on tomorrow - once all the paint is fully dry. So, basically all the components are now done, and just need to be put together permanently. 

While researching the nutcracker, I came across this webpage of unusual versions, that is worth a look. 
https://historymaniacmegan.wordpress.com/2013/12/14/on-the-christmas-nutcracker/