My new job is AWESOME!!

Not only am I out of the supermarket game, I get to work with FABRIC and CLOTHES all day!! Not so exciting to most people, however I feel like this is the perfect job for me!! Let me explain a little about what is involved...
We fit safety clothes and uniforms to agencies such as Police and Fire departments, electricity providers and Transport and prison workers. My main focus is the Fire Department, or FESA (Fire and Emergency Services Authority of WA), or in Aussie slang, the Fireys.
As part of my job, I fit individuals with their fire fighting gear. There are strict requirements as to the fitting of these garments, such as sleeve and leg lengths (we don't want them to burn their arms or legs!!) as well as allowing air flow around the body to keep them cool. I get to see a lot of different people every day, as well as talk to them on the phone, plus data entry and a little warehousing, too!
So, as I collect dolls and toys, and love to make doll clothes, the following challenge was issued - dress a bear like a Fire Fighter! Sounds easy, right?? Well, no.......
I do have an advantage, however. I can access the design drawings to use as a starting point. My intention was to create an exact replica in small scale, but as many will agree, this is NOT easy. I even bought miniature clips for the braces with the intention of using them but discovered very early on that this was not going to work. Too much bulk was created under the jacket and besides, Ted isn't going to need to get undressed very often, so I simplified a bit (read - a LOT!!). I was also going to use real reflective tape, but I couldn't find any by the metre, only full rolls, so I settled on a silver tape from the local hardware store cut to 2cm widths....

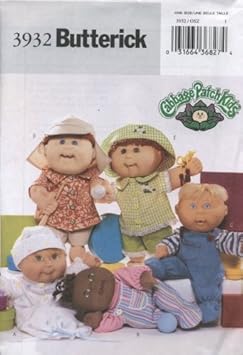
I started with a CPK pattern as a base (Butterick 3932), since one of them already has a peter pan style collar and I hate drafting these from scratch!! Turned out that there was little that needed to be modified in the body, just a little shortening, and the sleeves needed to be made more fitted. Generally, the CPK sleeves are just rectangles, so I added a sleeve head and a bit of length to create a more fitted sleeve. I should have straightened the body a bit - removed the hem curves - but I am NOT doing it again just for that!! It worked so well the first time, I don't think I will tempt fate again!! The trousers were from the same pattern, but made a bit narrower in the side seam and deeper in the crotch. I did actually make a toile to check the fit before cutting into my fabric. I'm so glad I did, or this could have been a "throw-it-in-the-corner-and-never-finish-it" kinda day. But, in a rare show of skill, it actually worked first time!! So here is my final results....
I did not make the bear - he was $1 from the Salvo's. He has a bit of a wonky face! His boots are oversized ones from a Doofles, which I painted black. They help Ted to stand on his own, and look cute too!! Next challenge is a safety helmet.... Hmmmmm......
 |
| Front, all zipped up |
 |
| Front, showing velcro flap over zipper |
 |
| Front with coat open |
 |
| Front fully open, showing trousers and suspenders |
 |
| Front, trouser opening |
 |
| Front showing suspenders and hem binding |
 |
| Back, trousers |
 |
| Back, coat and trousers together |