29 July 2011

I'm EXCITED!!!!

I JUST BOUGHT A BLYTHE DOLL FOR $2.99!!!

I walked into the Salvos shop looking for a flanelette sheet to use as a filler for that big quilt, and there she was, sitting on a shelf! My heart skipped a beat. I picked her up (trying not to look too keen!) put her under my arm, casually walked around the shop, thinking "I hope I actually have $3 in my bag!!!!". I took her to the counter, and the lady said "she's unusual" and I casually said "yes, she is, isn't she??" Then I poked around into the recesses of my purse to find some silver to hand over. Thank goodness I had enough money!!!

This is the SECOND TIME this has happened - what are the odds??? And this one is in much better condition...


The girl on the left is my first Blythe. She cost me $3 also, but her hair is very frizzy, her eyelashes are almost gone, one of her eye chips is missing and she doesn't have her string. The new one (ticket left on as proof!!) is in perfect condition, except for missing shoes. Hair needs some TLC, but her eyes work perfectly, she has her ring and string, and still has her underthings. Not sure if she is repro or not, but WHO CARES???? I certainly don't......

27 July 2011

Some of my older stuff....

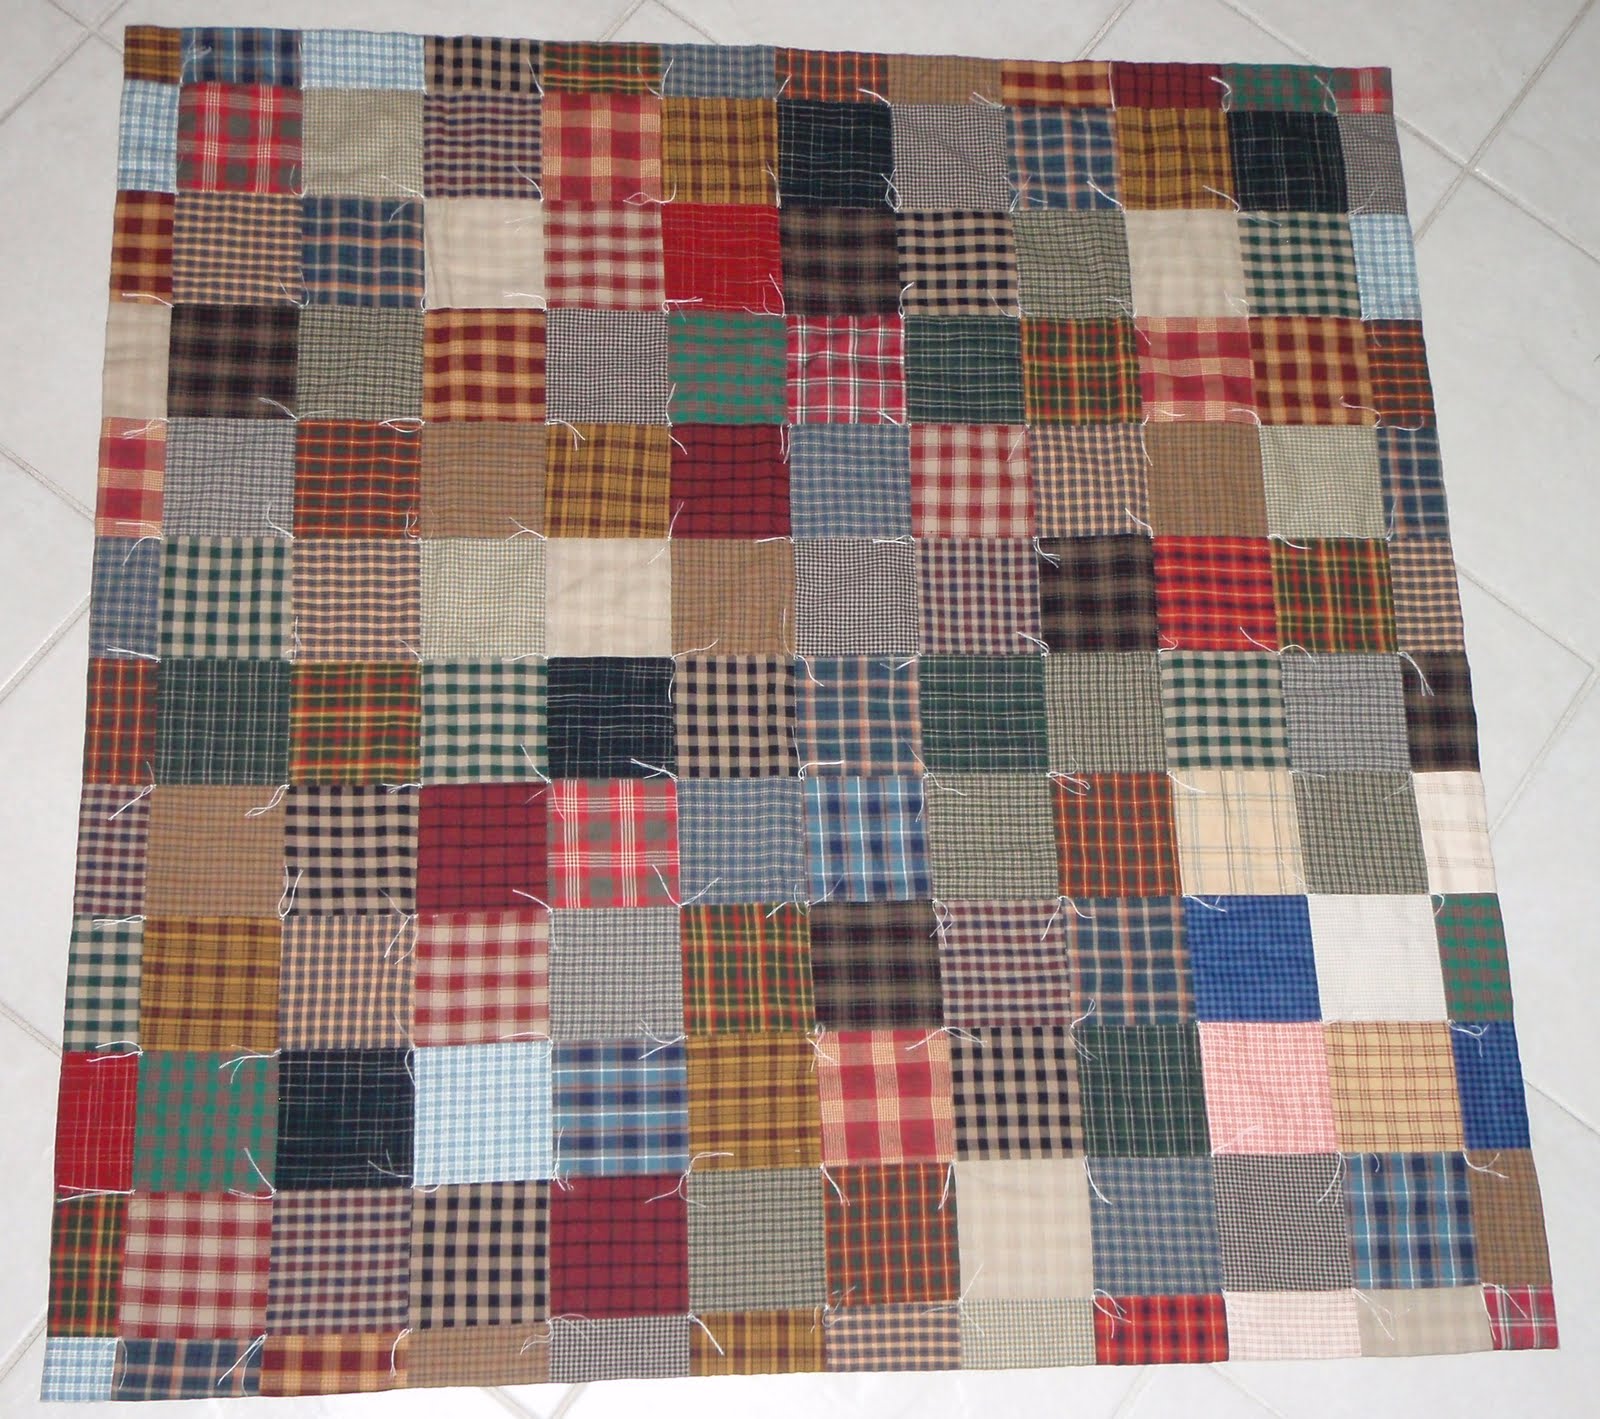
CHECKED SQUARES - KNOTS AND CROSSES (2010)
This was an unfinished quilt top given to me by Mum. It is hand stitched in 10cm x 10cm squares, 12 squares x 12 squares.
There were about 8 squares that just didn't work (strange colours, too bright) so I removed them and added new ones from my own stash. I can't even tell which ones they are, now!!
I used a piece of checked fabric I already had for the backing - it was slightly too narrow, so I decided to use the outer squares for a self-edge (otherwise there would have to be a seam, and that would be a bit yukk on the back)
I had a piece of quilt batting (nice piece, not springy) that fit perfectly, so all up this quilt cost me NOTHING!! I hand stitched the binding, but machined the tacks. I tried to do it by hand - I wanted that country look with the tails - but I didn't like it, so Mum suggested maybe use the machine. Brilliant idea!! I used a stitch that I liked, on zero width, and I did 2 stitches then turned 90degrees and did 2 more. it looks a little like a cross-stitch! I pulled the threads to the front, knotted them, and left the tails. I think its a good compromise. It took longer to tie the knots than it did to stitch the crosses!!

DENIM REVERSE CATHEDRAL WINDOW (2008)
This is made using circles of denim, which is turned to the right side and assorted fabrics are placed in the "window" and topstitched (I used a variegated thread on the bobbin and a blue on the top). You could use a fleece or flannelette for warmth, but I found that the denim was heavy enough and I didn't want to add bulk.
Not too happy with the edges, though....


GRANDMOTHERS FLOWER GARDEN (2) (2003)
This is my most recent quilt cover in hexagons, and the second I have made. The flowers are all different and, as you can see, vary in colour. I received a second prize for this at the Canning Show 2003. This quilt also won a First Prize at the Kelmscott Show, 2004.

RECYCLED DENIM QUILT (2003)

From an idea I read on the internet. The denim is "lined" with flannelette so that the back is tidy and the front is frayed. This won first prize in both the Canning and Perth Royal Show recycled item section 2003.


3D MINI QUILT (2003)
This miniature wall hanging is as vibrant as it appears! It is made with an origami type of fabric folding (finished size approx 40cm square). I added the leaves which are fussy cut from a piece of curtain fabric. The flower centres have small beads in them. Third prize at the Canning Show 2003 and second at the Kelmscott show 2004.


MINIATURE QUILT - SUNBONNET SUE (2003)
This miniature quilt won me the "Best in Category" at the Canning Show in 2002. I also received a second prize at the Perth Royal Show that year. It is foundation paper pieced and has a finished size of about 45cm square. This miniature quilt also won First Prize at the Kelmscott Show 2004 (second place above)

SEWERS ALPHABET (2002)
This is my version of the alphabet.
A=Appliqué, B=Buttons, C=Checks, D=Denim, E=Embroidery, F=Fur, G=Gingham, H=Hessian, I=Invisible, J=Jungle greens, K=Knitted, L=Lace, M=Measure, N=Net, O=Over locked, P=Patchwork, Q=Quilted, R=Ribbon and RicRac, S=Spots and Stripes, T=Tapestry, U=Underneath, V=Velcro, Vinyl and Velvet, W=Wool, X=X-stitch, Y=Yellow (any better suggestions??) and Z=Zipper


GRANDMOTHERS FLOWER GARDEN (1) (199?)
I made this quilt cover when I was still living at home. It is fully hand sewn, with no two flowers the same. I raided the remnants box - there are a lot of fabrics in there that I had clothes made out of and they are not necessarily cotton!! There are rayons, satins, drill - you name it, its there! It is lined with a light knit fabric.
After many years of use on my bed, some of the "non-cotton" patches were starting to perish and had to be replaced.

26 July 2011

Single Quilt - progress report...

Ok, so I've calmed down a bit since I wrote my last update....

I have managed to restitch the binding - I included it into the batting, so I don't have to quilt it (cheater!!), but I neglected to continue my stitching all the way to the end, so have had to add a bit of topstitching to make it feel complete from the back.


I have done the easy turned mitred corners, and recycled the striped fabric from the original border, but had to replace the original border. I used the same green fabric I had leftover from the backing (it was a bed valance, so it was already long and straight - brilliant!!).

Machine stitched from the front, hand stictched around from the back. Wrist a bit sore today after a marathon session, but at least I could catch up on some telly while I was busy!!


So this is the top as it stands RIGHT NOW! Sooooo close to being done, its driving me NUTS!! However, my machine started to drop stitches, so its off to get serviced, but then its ALL ON!! shouldn't take too long to finish - its just straight lines... HA HA HA!!!! (Using electrical tape to make sure I'm straight - dodgy, I know, but it seems to be working a treat!! Pics soon..)

23 July 2011

Single Quilt - some adjustment needed!!

The problem with finishing someone else's quilt is this:

What the h*** were you thinking???

Discovered a major issue with the top - the two borders flare out, so trying to lay them flat on the batting is IMPOSSIBLE!I have had to take them both off, although I think I can reuse the outer one to use as a binding.

I think some machine quilting is in order, but will need to recut and stitch the borders to make sure it lays flat. THEN some basic lines, corner to corner, and restitch the binding on.

I knew there was going to be some issues, but this early on?? That, I didn't expect!!

Oh well, better get back to it or it will NEVER get done!!

22 July 2011

I think I saw a UFO!!

Make that 2 UFO'S!!

And here they are....
Single bed size

Queen bed size

Both of these quilt tops are hand sewn - not by me!! I am strictly a machine kinda girl (with the exception of hexagons). The whole thing is stitched in WHITE, regardless of all the other colours, so in some places the stitching is quite visible. Hopefully it will be better once its quilted.

Mum's in the process of cleaning out the shed, and these tops were acquired somewhere along the line, complete with backing and batting, but never got to be finished.

The plan is to use flanelette as batting, since I don't want to spend ANY money on these, although I may have to buy some quilting thread. Since they are both hand pieced (yes, even the square one!) I think they deserve to be hand quilted. This is a first for me, as usually I prefer the machine-is-faster method, but I think some simple straight lines will work out great.


I have since removed the remaining cardboard from the second quilt and washed all the parts, and am in the process of ironing them flat. From here I will lay out all the parts on the floor and pin together. I can then get my big embroidery hoop and get down to it! Hopefully it won't take too long to quilt (famous last words....LOL!!). Hopefully I will update soon!!

01 July 2011

1990 - Draught stop Cow...

This cow was made for my brother. It was from a commercial pattern, and has yarn hair, button eyes and nose and has snaps at the joints. When not in use he will hang around all day on the door handle, but when needed he can be popped on the floor with his legs out to stop draughts coming under the door.

I think I made this one when I was still living at home. When my brother moved into a more modern house, he gave him back to me. He just hangs around my place on a door handle.

This just proves that I can't get rid of ANYTHING!!


1993 - TOUCHY WORM

I made this from this pattern on the internet. It consists of different sections, each with a different fastening, colour and feel. There is Velcro, zip, button, press stud and ties. His body is filled with fibrefill, rice, bean bag beans and a plastic bag. Fabrics are corduroy, brocade, fleece inside out and a heavily textured woven fabric. He won first prize at the Perth Royal Show educational toy category 2003, and a Highly Commended at the Kelmscott Show 2004


Another Doll Quilt..

From the look of my first couple of posts, you would think I was a quilter! I am totally not!! I like to dabble, but so far I haven't made anything else. I will rectify that soon, I promise!!
Ok, so I surprised myself with this one. I did the top using foundation piecing but not organised or planned. I just cut a bunch of strips using the 5 or so "matching" fabrics and put down a square and off I went! Some strips were assembled before they got added, to increase the "random" feel. You can probably tell I changed my mind partway through and started adding angled strips....
So once I made my "sandwich" (which I used 1 layer of flannelette - prewashed so it didn't shrink!) I decided to stipple in a large scale. I tell you, it looks so easy on YouTube!! Lots more practice needed before I'm going to be comfortable with this technique. It turned out OK, as long as you don't look too closely.....