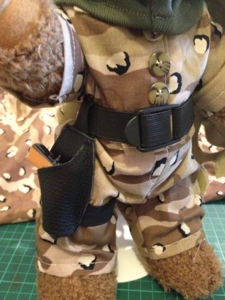
I had been hunting a small-ish gun ever since TRG bear was created. I knew he needed more than just his camo pyjamas, and I found one at our local market!
The gun is actually a keyring, and not technically the correct gun, but who's looking that closely?
The plan was to make a thigh holster. I just used elastic for the waist and leg strap, and leather for the holster. Again, not technically correct, but the gun fits well and it looks cute!
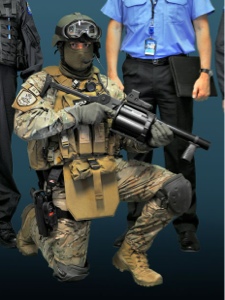
I also had the idea of making a balaclava. I don't knit, and I have no idea how I would crochet one, so it's gotta be fabric! I made one out of a textured knit, but after walking past it for a day, I decided it was not the right colour, so I remade it in a darker green. Much better!
Finally, he needed some camo netting! How can you hide in the scrub without the right camouflage? After studying some pics online, I worked out the right pattern, then I cut on all the lines, gave it a little rinse in some water to fluff it up, and voila!
Let's go fight some bad guys!!
30 December 2012
25 December 2012
Another one bites the dust.....
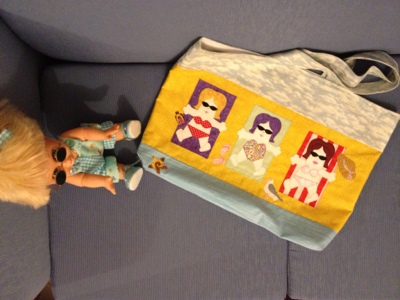
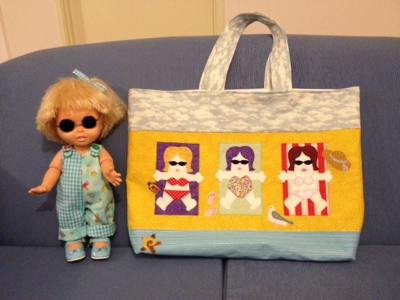
Bag.... DONE!!
A very productive Christmas Day all round, I think.
Finished up all the appliqué, handles and lining, only need to close the turning hole and I'm done. Another potential Show prize winner - I hope....
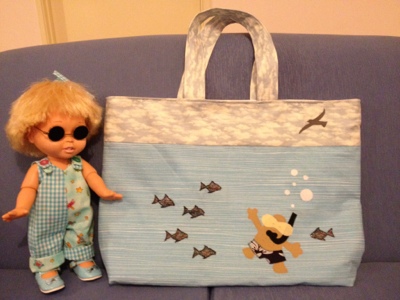
Since all the items I added (and I'm very proud of my seagull!) had very small pieces, I used the straight edge stitch technique. The was no possible way that I could have gone around many of those pieces with the blanket stitch. I also did this for the sunglasses. I probably should have done the whole project with this technique, but I was following the instructions at the start, then just, sort of, made it up from then on!!
As I had run out of the water fabric, I used some sky fabric I bought for the Apple Tree wall hanging, however this meant the starfish didn't look right floating in the sky, so I deleted them all, bar one, that I hid in the bottom left corner. I also added a silhouette of a seagull onto the snorkeller, however looking at it now, it looks a bit like a vulture circling its prey. Maybe if I had made it white instead of grey?? Too bad, it's done now!!
Boxing Day tomorrow..... No family until 2.30. Wonder what I can get started before then? Maybe I need to sleep on it.....
Playing around.....
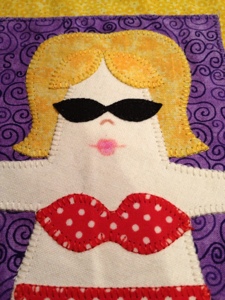
Added a couple of embellishments to the Bikini Babes. This was soooo much fun!!
I scoured the Internet for free images, and drew freehand copies of a hat, seagull and thongs! Plus some imaginary fish and bubbles for my snorkeller.
Still need to attach them permanently, but so far I'm happy with the results....
It's such a hot Christmas Day, I'm glad we were able to stay cool! No plans for visiting family today, but tomorrow is a whole different story! I hope my local butcher is open, because I plan to make our signature pulled pork in the slow cooker. All I'm missing is the pork!
24 December 2012
Progress!!
Appliqués are done. Now, for some extra stuff!!
I need to cut out some starfish, some bubbles and maybe some fish.....??
Let the fun begin!!
I need to cut out some starfish, some bubbles and maybe some fish.....??
Let the fun begin!!
Bikini babes.....
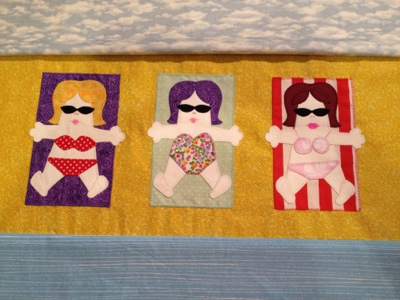
12 months ago, when Bernie was playing up, I made a couple of Bikini Babes from a Patchwork and Sewing magazine. I preparation for Bernie's return, 3 bikini babes and one snorkeller were completed.
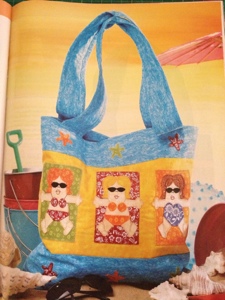
They are supposed to be on a beach bag, and I think that I will follow this idea, although slightly modify the proportions - not because I think it will look better, but based on the size of the fat quarters I bought for the sea and sand!
As you can see from the magazine pic, there should be the same print top and bottom, plus the side that is not shown of the snorkeller underwater. I don't have enough "water" to do both, but I do have some sky that can be used for the top and handles, which I think will suffice.
I have already cut the back with the snorkeller and ironed him on, and prepped the girls on the sand panel, so lets get machine blanket stitching! I think I'm an expert, after the last one!! LOL!
The pattern is from smeedesigns.com, and they have a bunch of cool designs I would love to try. Maybe I will even email my finished bag to put into the gallery? Depending how it turns out, of course.....
23 December 2012
Done...... NEXT!!
But not without more drama.....
More lessons learned - pins. More pins!! Even more pins!!
Even when you think you have enough pins, add more pins!
I decided to machine finish the binding, but clearly did not use enough pins. Looked fine from the font, but the back was a shambles. More unpicking, more pins.
After 3 perfect corners, one decided to fail, but I think I managed to hide it pretty well. Also decided that the quilt shall be a wall hanging, rather than a practical quilt. Apart from the fiasco with the colour bleed, then the fabric shrinking, adding the buttons and hair pretty much sealed the deal! Would definitely not be a comfy wrap around....
Oh, and here's a pic of the pattern from the magazine, jut to show the inspiration.
So, next on the agenda?? No idea, yet! Stay tuned....
16 December 2012
The home stretch...
Given the fiasco with the shrinking of the borders, I knew quilting this would be a nightmare to quilt!
Not only did the border fabric shrink, it seems the off-white fabric did also. The quilt top got a bit baggy, so definitely not a show winner! Pity, though, cause this was such a fun and easy project.
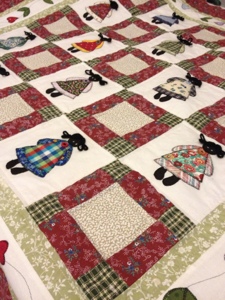
The original pattern called for hair with a button in the centre, however once I had some hair on, it would have been way too bulky, so I used the button on the dress instead. So cute!! And the eyes were supposed to be French knots, but I used some white paint, for simplicity.
Also, the pattern called for stipple quilting on the dolly patches, but given the top was no longer flat, I thought a bit of echo quilting would be much more appropriate.
Just the binding to go, and she's all done!
14 December 2012
Quilt top done.... Almost!
I'm all ready for backing and batting!
However.....
This is not the end! Each little person still needs eyes, hair and button. Instructions say to do this after quilting, but we'll see....
Heading out today to find some backing and batting, hoping to spend very little. So far, the only things I have bought for this is the off white base fabric and some visoflix, since I ran out halfway through! Amazing to think all that was already in my stash! Oh, but there is more.... Way more!!
As I was sewing, happened to glance up and saw a suspicious looking character. Want are you looking at?? LOL!!
12 December 2012
Take 2...
So, I unpicked border 3, but decided against replacing border 1 as well. I think I can mask the faded bleach spot with some topstitching. I hope!! It was just far too risky, since border 2 was already done.
Will NEVER use fabric unwashed, or at least rinsed! Lesson learned!!
Experimenting with border 4 now. Nor sure whether to use the same red floral from the pieced blocks, or something else. May not get to this one till the weekend, but we'll have to see how it goes!
Power went out last night, major storms and some flooding around the south west, so woke up early and was able to prep the replacement of the borders before the sun was up. I'm surprised the Boy hasn't asked why the power spiked at 6am! Maybe it wasn't recording the usage.....
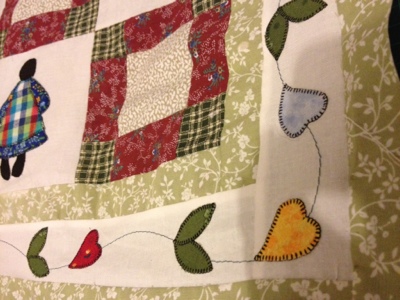
Anyhow, here's some pics. The one with the whole block shows the bleachy spots on the border. The legs also got a bit faded, but fixed that with a black fabric sharpie!! It was only the red part if that check that bled. Amazing! Plus a close up of border 2 with the hearts, leaves and vine.
Hopefully, it's a calm night ahead....
09 December 2012
I learned an important lesson!
While preparing the second border for the appliqué vine, I discovered a secret - one of my fabrics was not prewashed and shrunk significantly! I had drawn the vine freehand with water dissolving pen, stitched it on the machine and lay it on the floor to get a good look. I was very happy with the curves and layout, so sprayed water on there to remove the blue and it instantly puckered up!
YIKES!!
Panic set in, but didn't think it was such a big issue, so ironed on the hearts a leaves and blanket stitched them before the Boy got out if bed. All done, I thought I might as well dunk the offending fabrics and hang them out in the line, so if I have to recut the border, it won't shrink again. No problem.
I also thought I better dunk the quilt top to shrink any other fabrics that may be distorted. No problem.
UNTIL.....
I went to retrieve the top off the line only to discover one of my appliqué fabrics had run!!
RED!! AAAARRRGGHHHH!!
Tried a spot remover - no joy. Tried some Napisan - nup. Bleach - risky, but worth a shot.
DO NOT USE BLEACH!!
Now, not only do I have red stain, I also have a faded patch on the closest binding to the block.
AAAARRRGHHHH!!!
I suppose I should be grateful that I can replace the block if necessary, and I have plenty of spare fabric to redo the border, but its gonna be a nightmare!
While I'm waiting to see if my block is saved, I will redo a new one, prepare for the worst, and shed a little tear while I unpick border number three.
Note to self - PREWASH EVERYTHING!!
The irony is, the particular fabric that bled was just a small piece from my scrap box, not big enough to warrant a proper wash.
I'm not happy about it, but I'm not going to throw it in the corner just yet.
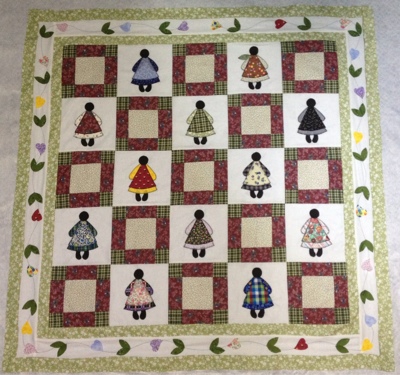
Here is a pic of the layout before the disaster........
08 December 2012
Borders are on!
The first 3 borders are attached.
Now to do the appliqué on the middle one. All the bits have been cut out, just need to sit down and plan where the vine is to go. The instructions are pretty vague, but at least I have a full glossy picture to refer to!
Now to do the appliqué on the middle one. All the bits have been cut out, just need to sit down and plan where the vine is to go. The instructions are pretty vague, but at least I have a full glossy picture to refer to!
07 December 2012
Patches are done!!
I trimmed all the pieced blocks so they are all now square. So fun time begins!
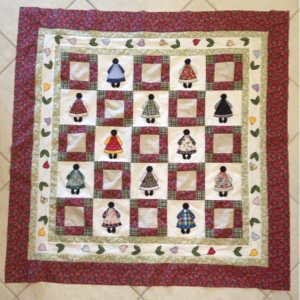
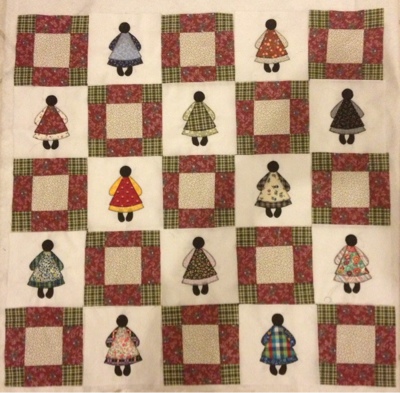
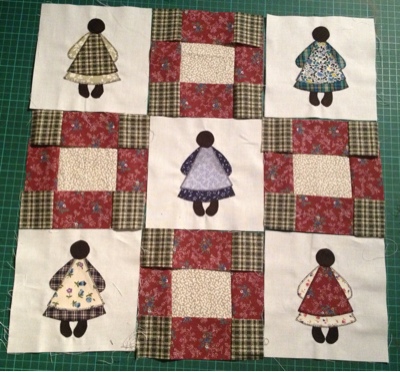
Tried a bit of a layout, and I'm pretty happy with the result.
The best thing about scrappy, is no matter how you lay it out, it always seems to work! Decided that this would be the best layout. Now to stitch these rows together, and start border number one....
Tried a bit of a layout, and I'm pretty happy with the result.
The best thing about scrappy, is no matter how you lay it out, it always seems to work! Decided that this would be the best layout. Now to stitch these rows together, and start border number one....
05 December 2012
Second phase - pieced blocks...
So, the girls are all finished. Now for the pieced blocks!
I used the strip method to make the strings, then cut into smaller pieces. Still have to join these together but it's a pretty good indication of how they will look together. Not bad at all, in my opinion! I have not used this method before, as normally my blocks are pieced. I have to say my opinion has changed DRAMATICALLY!! I always thought that "plain" pieced blocks were boring, but there are so many ideas floating through my head using thus technique. Just hope my accuracy is up to the task! I soooo need to get a proper quilting ruler......
A little taste of what is to come!!
02 December 2012
Updated pics...
I took some new pics of my blocks so far.
I probably should have added some lining to some of the lighter colours to avoid the darker ones showing. You don't always see these things until you look closely at a photograph! Oh, well... Hopefully, once the blanket stitching is finished, it will detract from the shadow?
Cross fingers!!
I probably should have added some lining to some of the lighter colours to avoid the darker ones showing. You don't always see these things until you look closely at a photograph! Oh, well... Hopefully, once the blanket stitching is finished, it will detract from the shadow?
Cross fingers!!
01 December 2012
Something new...
I was given a bunch of craft and quilting magazines, and have been so inspired!
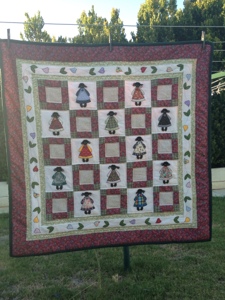
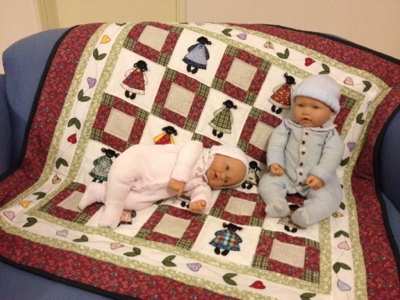
One quilt in particular caught my eye..... Scrappy and simple, a little country.... Blocks are small and fast to make! Not sure on the final quilt size, but I'm having fun! Bernie is giving me grief again, may be time to upgrade.....
So, blocks are 15cm when finished, 12 applique blocks in total, plus some pieced ones for good measure (not done yet), plus 4 borders! Will probably do 3, with the middle one with vines. Challenging, but simple enough keep me interested.
My pics are pretty rushed, but couldn't wait to publish my progress! Better pics to come.... Raw appliqué on the top row, finished ones on the bottom. They still need their finishing touches, but I'm halfway there, so far.....
16 November 2012
And the winner is.....
So, the Canning Show is over for another year, prizes are awarded, presentations done....
Not too thrilled with my entries this year. Only one was planned, one was already half done, two were from last year that didn't receive prizes, and the last one was soooo rushed, I am also ashamed that I put it in at all....
Lets start from the top!!
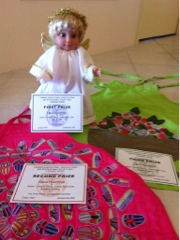
FIRST PRIZE
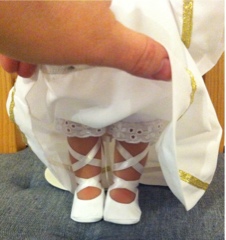
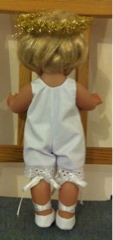
I had already made the dress for the Angel doll years ago, including the shoes, it just needed finishing! I made some underwear, added the wings and voila! Prize winning Dressed Doll.
SECOND PRIZE
I made this pink apron for last years show, but there was no category that fitted, so no prize. It is fussy cut shoes ironed on, and quilted.
THIRD PRIZE
Same as the pink one, the green apron was already done for last year. Fussy cut flowers, sil leaves and the vase is a pocket. All my own design! Not big on practicality, but visually, not too bad. It WAS ironed when it went in, not that it looks like it now!
OTHER ENTRIES
The Foster Child was made, but the clothes were very rushed! Not my best work. Almost too embarrassed to put in, but thought what the heck?? I paid my entry fee!! There were some gorgeous entries up against it, so no surprise that there was no prize. (I'm a poet and didn't know it! LOL!!)
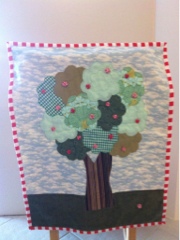
The Christmas Star mini quilt was out-gunned by a much bigger quilt, and the Apple Tree wall hanging was also not up to the standard of the others. A comment attached said it needed more quilting, but I followed a pattern! Maybe I will add some for next year? I'm already 2 up!!
Every year, mum and I say the ribbon is ours, but every year we leave it too late! One project per month equal 12 entries - in theory....... My problem is motivation and inspiration. I never seem to have both at the same time! The hardest part is starting.......
23 September 2012
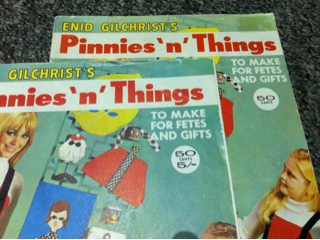
Enid Gilchrist, another collection obsession...
Along with my collection of dolls and miniature seeing machines, I LOVE old sewing magazines! Or more specifically, magazines by Enid Gilchrist.
Enid Beatrice Gilchrist was a fashion designer who revolutionised the way Australian women made clothes from the 50's to the 70's. She developed a drafting system that allowed the home seamstress to create styles of the day with ease.
Originally, Enid wrote articles for New Idea, and later created a series of magazines with designs from babies to adults. It is these that I collect, although any old sewing books interest me.
I love the hand drawn illustrations, the designs - even the browning paper they are printed on! That smell is so distinct!!
Although I have quite a few, it is nowhere near a complete collection. Many are duplicates of the same magazine with different pricing, or even a complete cover change! Many have damaged or missing covers and I'm always on the lookout for replacements. But having a damaged one is better than none at all!!
List of titles I have complete :
Clothes for your Baby
Baby Book
Girls Gear
Boy and Girls Clothes
Undies, Beach and Sleepwear
Women and Teenagers
Play Clothes
Little Coats and Dresses
70's Styles
Under 5
Sixes and Sevens
Three to Six
Six to Nine
Nine to Eleven
Sleepwear and Undies
Fancy Dress
Pinnies 'n' Things
Dolls Clothes
Maternity Wear
Betweens (no cover)
Preschool Clothes (no cover)
Toddlers Clothes (no cover)
Looking for :
Teen Dolls
Kindergarten Set
Ten to Teens
Teenagers and Small Women
Casual Clothes
Not sure how many more there are!
These are titles listed on the backs of the magazines that I don't have. I will try and do a better matchup of older and newer covers at a later date, maybe even a chart! Time pending, of course!!
15 September 2012
Angel baby...
I started this project MANY years ago after I bought the doll from an Op Shop. I thought he had the most angelic look about him, so of course he had to become one.
I had already completed his shoes and gown out of really soft fabric, and the wings were already purchased. All he needed was some underthings and the wings attached. The problem was that his arms turn outward so any clothes need to have enormous armholes! Not such a problem for the gown, but the underthings were a little more difficult.
I hunted through my books to find a solution, and the Doll Dressmaker was full of ideas. I thought a onesie would work best, but how do I reduce the bulk at the back and shoulders, while allowing for the arms?? Make it like an overall, with a bib and brace style front. Worked a treat!! With some careful planning I managed to hide all the Velcro stitching into the lining and even put a little lace on the hems! Took the best part of this afternoon, but worth it, I think.
Since I made an extra special effort in my neatness, he will go in for judging at this years Canning Show.....
Subscribe to:
Posts (Atom)
