31 December 2014

Minions DONE!!!

What a cute group. Looks like they are having a good ol' chin wag, don't they?? Banana!! ;)


What more can I say, but the middle one is my fave.......

I have a new nutcracker on the go, too - with a twist. I am trying to use the proportions to make something specially for Australia Day. If it doesn't work, he will become a nutcracker. No point wasting it :)


Planned this one out in the middle of the night, as you do. He will have bent arms, and possibly holding something - not sure yet what that will be. Maybe a flag?


And he will wear some thongs...... 


This is going to be challenging, but a load of fun!!

30 December 2014

Minions - so close to completion!!

Soooo close!! Just need mouths, and we are DONE!


Added some eyelids, too. A pair straight, a pair curved, just to see what they looked like. ;)


Check the hair on this dude!


And some more spikey-ness on this one....


And from above -


Hopefully I can get the mouths done tomorrow - New Years Eve! Don't have any party plans, so I can stay at home and play....

28 December 2014

Final stages! Yay!!

So, just waiting for the glue to dry, and I can put all the bits together! YAY!!

Learned a lot along the way. Firstly, spray paint goes bad. The red paint I used had been in the shed for quite some time, and had heaps of trouble getting an even coverage. The other colours were bought new and worked perfectly. I will try using coloured paper next time....

Secondly, do the face first. Since I started with the hat, and attached it, then had an issue with damage and had to redo it, I would definitely leave it till last. Trying to patch it up was not 100% successful. Also, trying to put the face on would be easier without the obstructions ;)

And here he is!! 


Close up of his torso and sleeves...


View from above...


From below... 


27 December 2014

Disaster strikes!!

I had a fail... :(  A BIG one....

His head fell over (since I haven't attached it to the body yet) and the bead on his hat came off with a bunch if paint. DISASTER!! Especially since everything else has been attached. I tried to just tape off the top and re spray, but the tape I used took off MORE PAINT!! O.M.G!! You can't be serious??

I had to scrape all the paint off and start again. More taping off, more primer, more paint, and I think I have succeeded...to a point. This will definitely be a keeper.

Anyway, I went back to Bunnings and got some rectangle pine to use for his boot. They may be a little long, but, as already mentioned, it's a keeper :)

He is not yet glued together, but I think he is progressing nicely...in spite of everything that has happened today.


I also redid a nose, so his face will be on tomorrow - once all the paint is fully dry. So, basically all the components are now done, and just need to be put together permanently. 

While researching the nutcracker, I came across this webpage of unusual versions, that is worth a look. 
https://historymaniacmegan.wordpress.com/2013/12/14/on-the-christmas-nutcracker/

26 December 2014

Nutcracker progress...

Having a bit of trouble with my spray painting. Not sure if it's technique or if the paint is bad, but I can't seem to stop the runs! 

I think I'm gonna cover the arms with felt to match his coat, but the legs will have to be painted. I have also bought a spray primer to try and stop the streaks from the brush. Not too sure it is any better, but I will give it another shot tomorrow. I haven't decided how long to make his legs yet, although I have bought a plain coaster as the base to screw it to ;) Loving the gold fringing, too. The girl at Spotlight laughed when I said I only needed 10cm. Why buy more than I need, right?? LOL!!


Having a dilemma over his nose, though. The foam piece I tried was not compressed enough to hold its shape (see below pic), so I need to rethink what I'm going to use instead. I have, however, got the rest of the face sorted. 


And, his hair is on and his hands are painted, so he is progressing pretty well, I think. Just more painting a glueing tomorrow, and we should be done! Then I can get back to my minions.... :)

24 December 2014

Merry Christmas!!

Ho ho ho!! Tis that time of year again. Feels like just another stinkin' hot Summer day here in Oz....

I have 4 minions half done, waiting on clothes and hair, but legs and eyes are done ;) Unfortunately,  I have been a little distracted....


... with this guy. He is half done, but you get the idea.....


I thought about how to do a nutcracker for a while now, and the minion shape was not going work with the curved top. How could I change up the shape, and not have to spend any money? A plastic cup, of course! And, as luck would have it, it fits perfectly at the ridge! OMG! How lucky is that??? And a plastic bottle lid made into a hat. Perfect!!


Once again, I have turned my tin upside down, to assist with the flat base for the top, and easy access for the legs through the lid. I plan on using the same technique as the minion legs for this, screwed in from the top, but also attached to a base for stability.

I need to buy some heavier dowell to use for arms and legs, but so far, not a cent spent! Love that, and it's almost all recycled... To be continued....

07 December 2014

It's a bird, it's a plane....

No, it SUPERMAN!! Well, mini Superman, anyway.....


These dress ups were already cut out by mum, but needed to be sewn together. The first one was a bit of a failure, but still useable. After much thought I worked out a better way, especially since no instructions were included. :(


The logo was traced on visoflix, then onto a base fabric with a vilene backing. It makes it stiff, but stable. Also, there was no rib trim included, but thanks to my stash of random colour knit, I found a pretty good match.


4x down, 3x to go, but with all the extra fabric I'm giving back to mum, there could be more on the horizon!

21 November 2014

How I made my Minion

Supplies:

Cardboard tin - coffee, custard, gravy, etc
Styrofoam balls
Paint
Plain paper
Spray paint -yellow and black
Glue - PVA works fine
Dowell
Screws
Denim
Iron-on Vilene 
Ribbon
Googly eyes
Plastic tube to fit eyes
Cardstock 
Split pins
Coated wire
Pens and pencils
Assorted tools -screwdriver, drill, hammer, cutters


First, make sure your ball is going to fit the tin. You can do this by placing the ball in the neck of the tin.


Cut the ball in half - I use an old serrated bread knife - and glue it to the BOTTOM of the tin.


Cover the ball with layers of glue. The tin, in this case, is quite dark, so I painted a layer of white to lighten it before covering with paper, which was measured to fit with a small overlap. Make sure any bubbles are removed as you go.


Once it is dry, cover with two light layers of spray paint. Allow to dry completely between coats. The paper layer on the body absorbs most of the first layer. The second creates the glossy appearance. Be prepared for a bit of a lingering odour, but this will disperse once dry.  


While this is drying, you can go ahead with making the legs. Cut the dowell to length, and mark the centre of each end. I punched the centre with a nail, and used my screws to make the holes. You can pre-drill if necessary. Also, mark the location of the legs on the lid and make the holes. 


Test screw the legs in place.


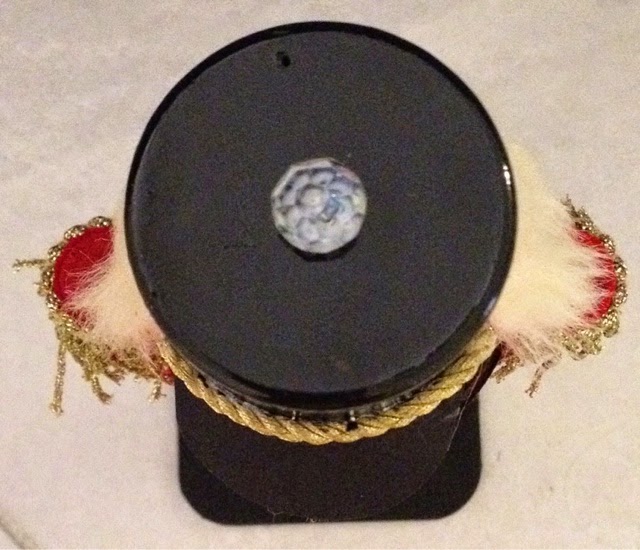
To make the shoes, take a smaller ball and cut in half. Trim each half by cutting a bit off each side.


Drill a hole in the other end of the dowell to accommodate a length of bamboo skewer. Glue in place.


Cover the styrofoam with layers of glue and allow to dry. This can then be sprayed with paint and set aside.  (I used a chunk of pool noodle and bamboo skewers to hold up my shoes. Pool noodles are the most useful things!! And cheap, too. :) )


Trace pattern for overalls onto iron-on vilene. Do not cut out! At this point you can also cut a strip of vilene wide enough for the legs. 


Add the stitching details to the trousers.


Trim on the lines...


... and glue in place on the base of the tin. Cut the strip to fit onto the legs. Trim if necessary.


Put glue on the end of the legs and secure feet in place.


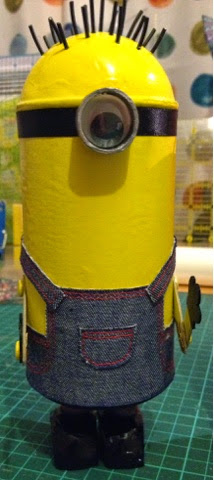
Make the goggles by trimming tubing to the depth required. Paint or trim with foil. Allow to dry and glue eyes in place from the back. Glue ribbon trim in place along edge of tin and glue on the eye/eyes.


Choose the hair type, then make the holes in the head for the hair strands. Insert the lengths of wire and mold them to fit. Once happy, glue in place.


Draw mouth design onto scrap paper. Colour with pens and pencils. Trim and glue into place. I made several types, and tend to freehand draw a bunch and see which one suits best. In this case, he has a toothy smile


I painted the top of the split pins to blend them in better. I have done this on before on Dorothy, and simply sprayed the tops with paint after an undercoat of gesso.


Trace the arms onto some cardstock, then lightly sprayed on both sides. You can see the bubbles where my paint was a little thick. My bad! It's still ok on the other side... ;)


Once dry, cut out the shapes. Paint the gloves with black paint. Mark the holes and put through the pins. Given the narrow piece, I trimmed the pin once it was flattened out, so it cannot be seen from the front.


Pop them onto the body with the split pins, and open the pins as flat as possible inside the tin. Put the legs back on....


And that's it!! Minion number two is done!!


They are a naughty pair.....


I have 4 more prepped for paint, so let's see where I go from here! :)